By default, tools and GUIs such as Humongous cannot directly access a DocumentDB cluster from outside of its VPC. This is a security measure put in place by AWS to prevent DocumentDB customers from accidentally exposing their database.

In order to connect Humongous to your DocumentDB cluster, you need to create a proxy that will act as a bridge between your cluster and the outside world.
Don't get discouraged at the sight of the word proxy. The end-to-end process is very simple and will take us less than 15min.
This is what the end-to-end diagram looks like.

Identifying your cluster's VPC ID
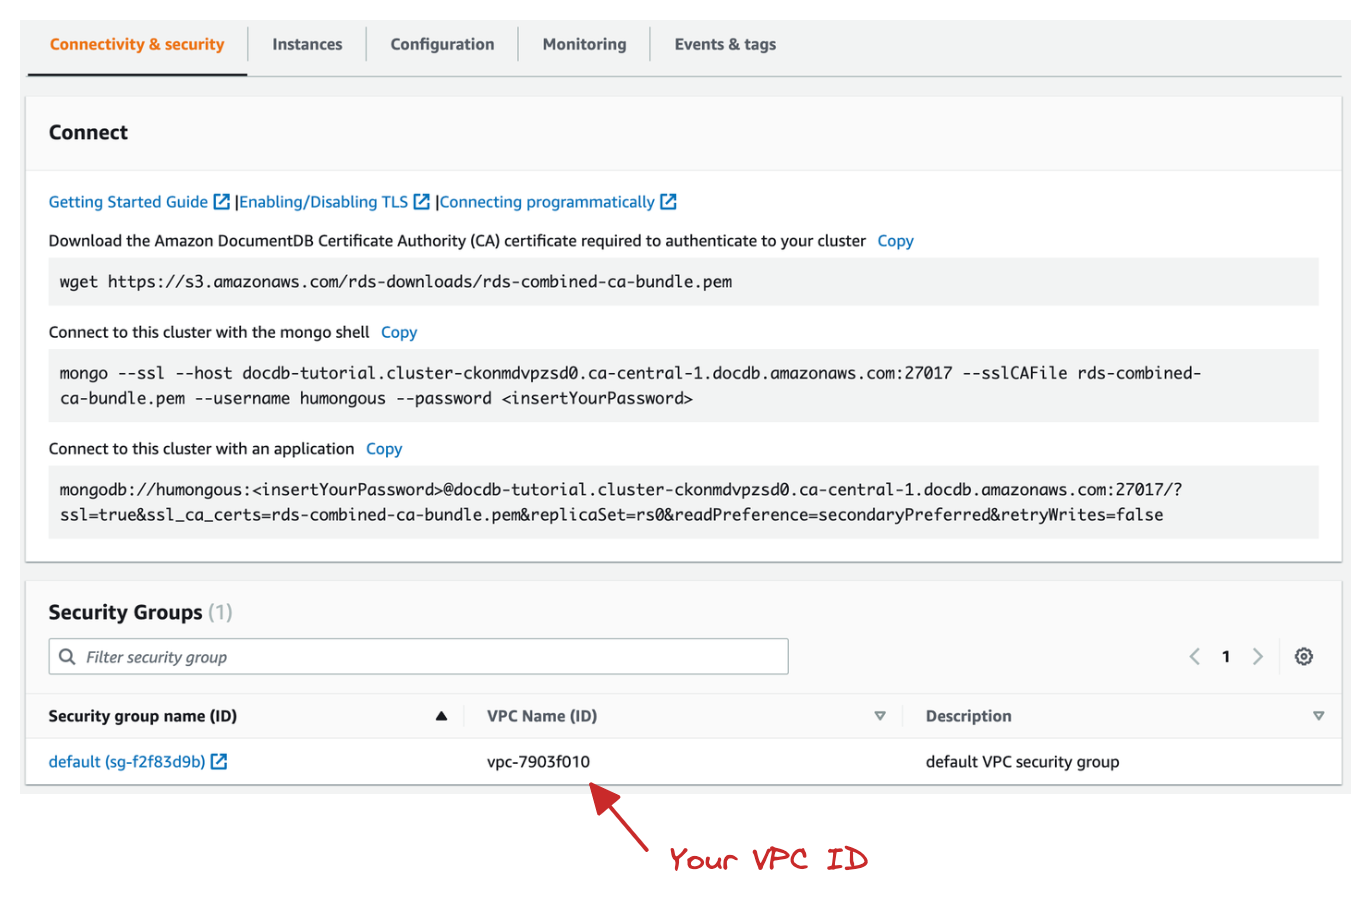
Your DocumentDB cluster and the proxy need to be in the same VPC, so let's start by identifying your cluster's VPC ID.
Head to your cluster's home page and look at the Connectivity & security tab. Your VPC ID should be at the bottom of the screen, in the Security Groups section.
Create the EC2 proxy
Once you have identified your VPC ID, you need to create an EC2 instance within that VPC.
Go to the EC2 instances page, and click on Launch Instances to bring up the EC2 instance creation form.
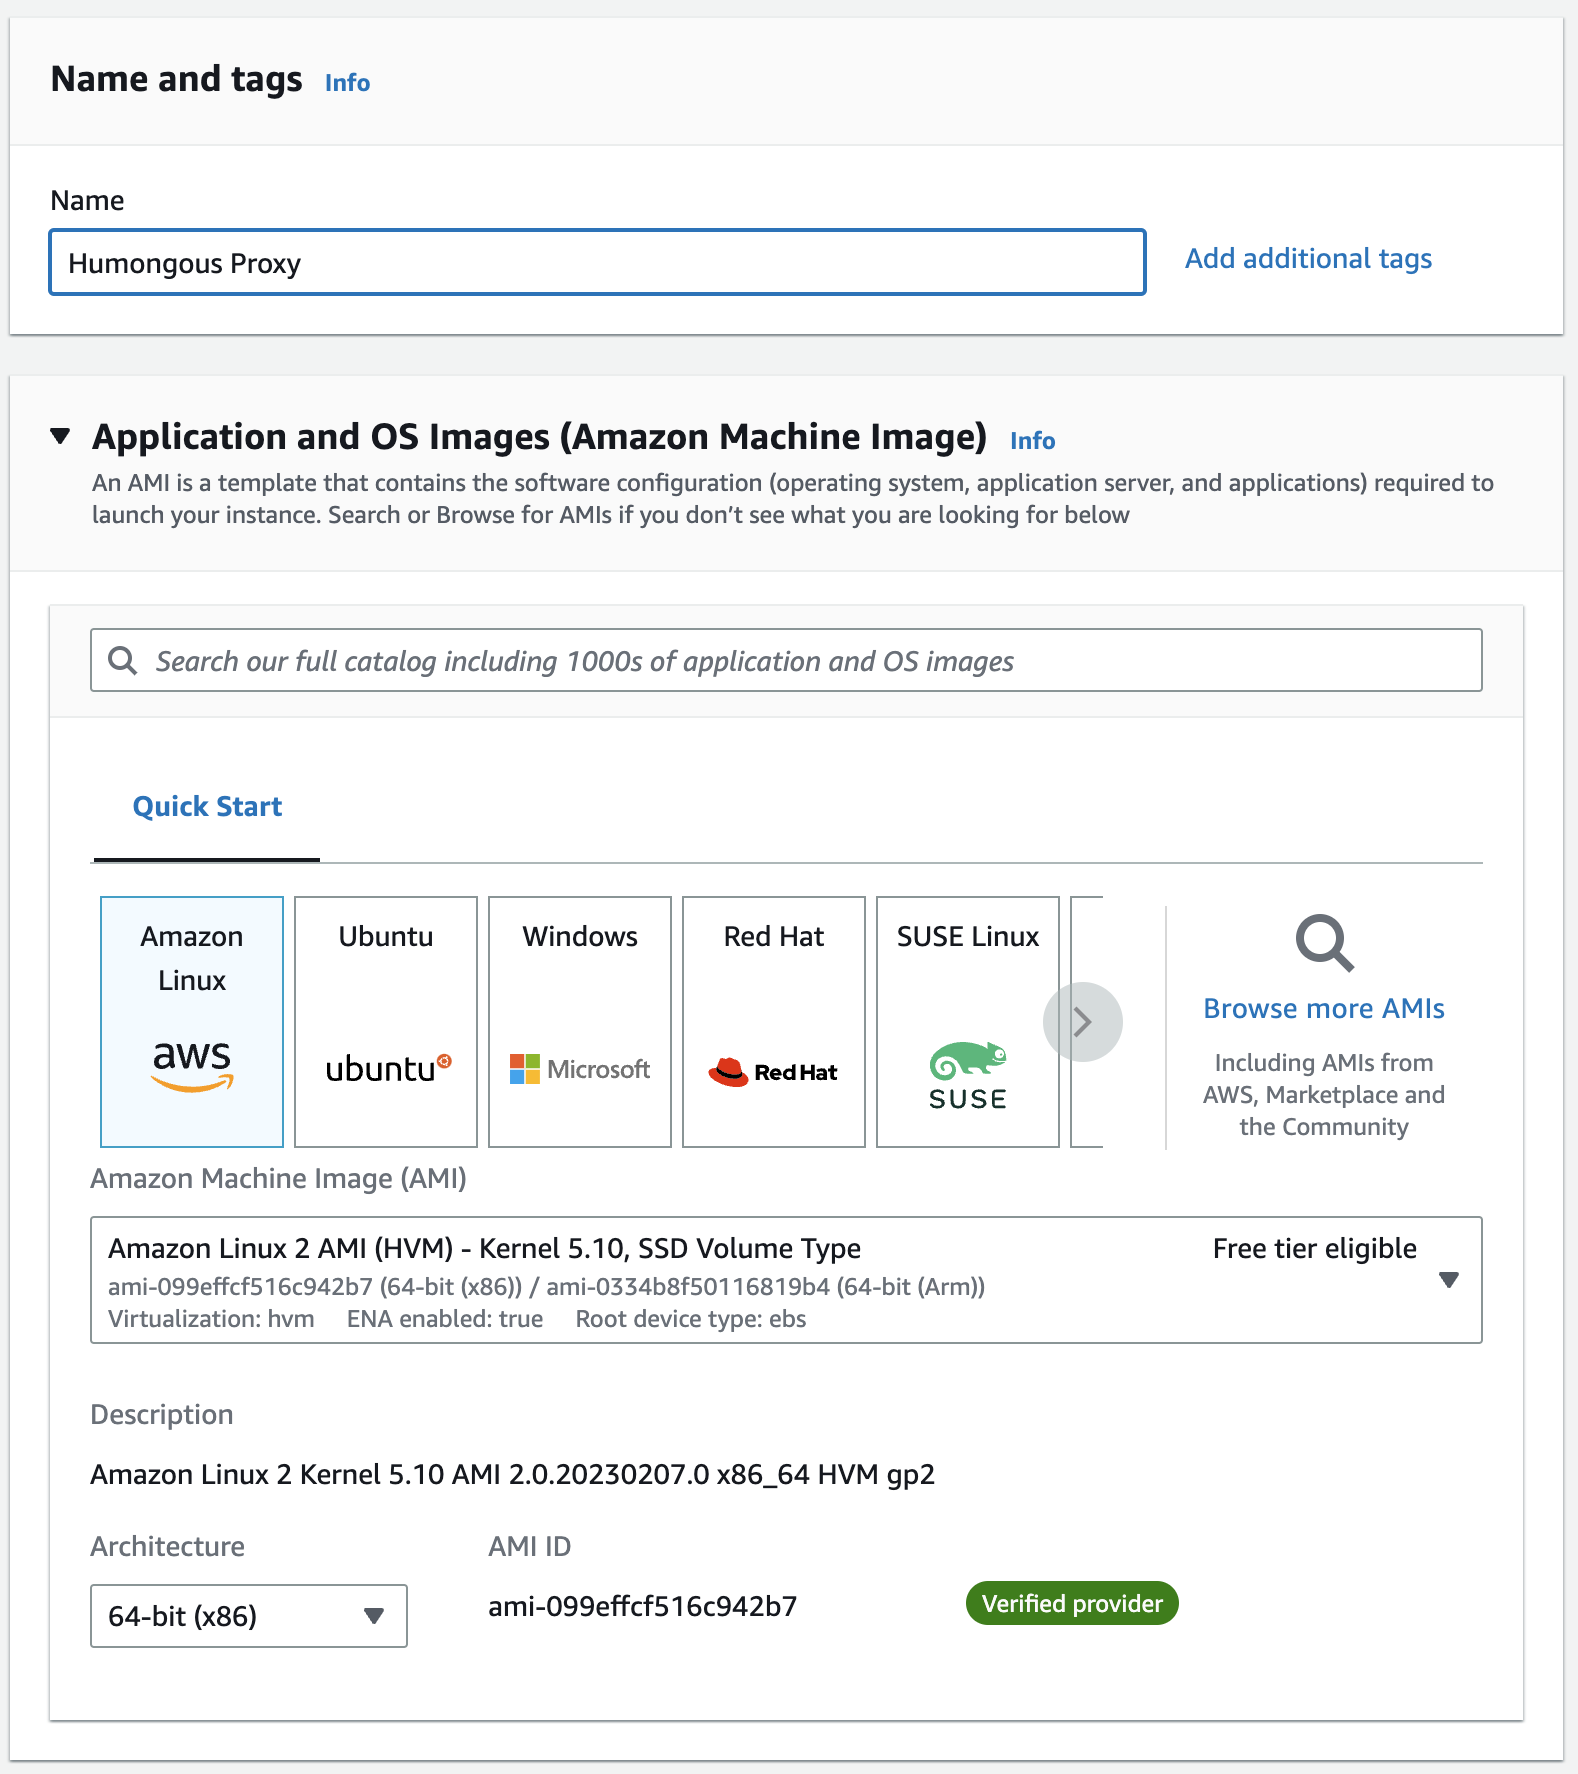
Enter the name of your EC2 instance (e.g. Humongous Proxy) in the Name field, then select Amazon Linux as the OS image, and t2.micro for the instance type.
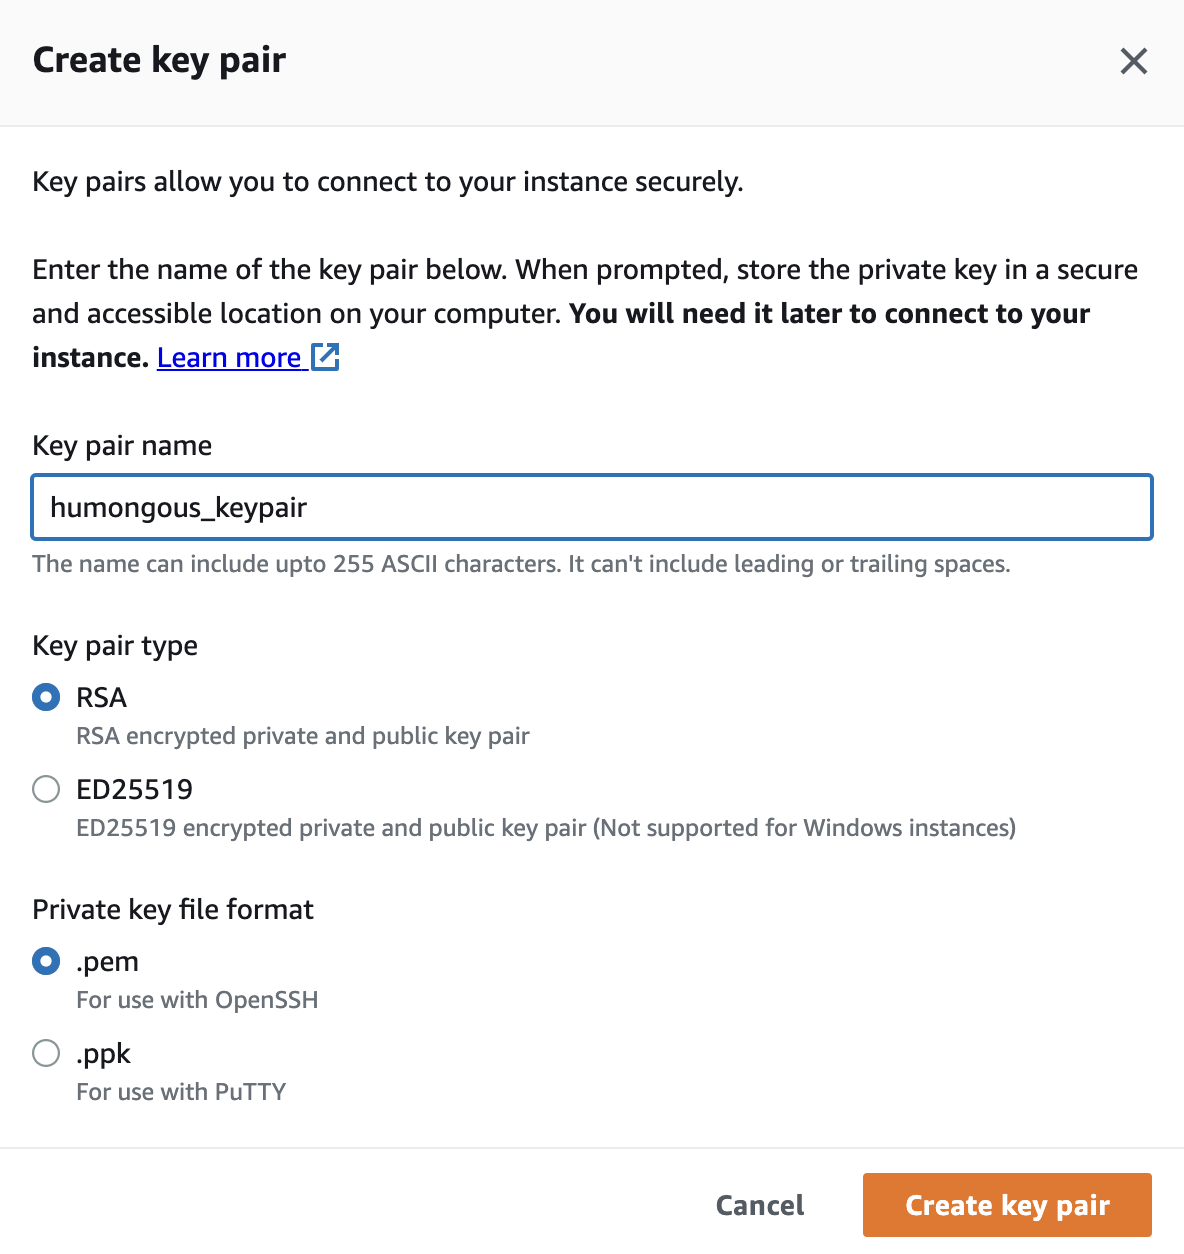
Next, you need to create a new Key pair to establish an SSH tunnel between Humongous and your cluster. Click on Create new key pair. Leave the Key pair type as RSA, the format as .pem, choose a name for your new key (e.g. humongous_keypair), and save. Your new key will be automatically downloaded. Make sure to keep it somewhere safe.
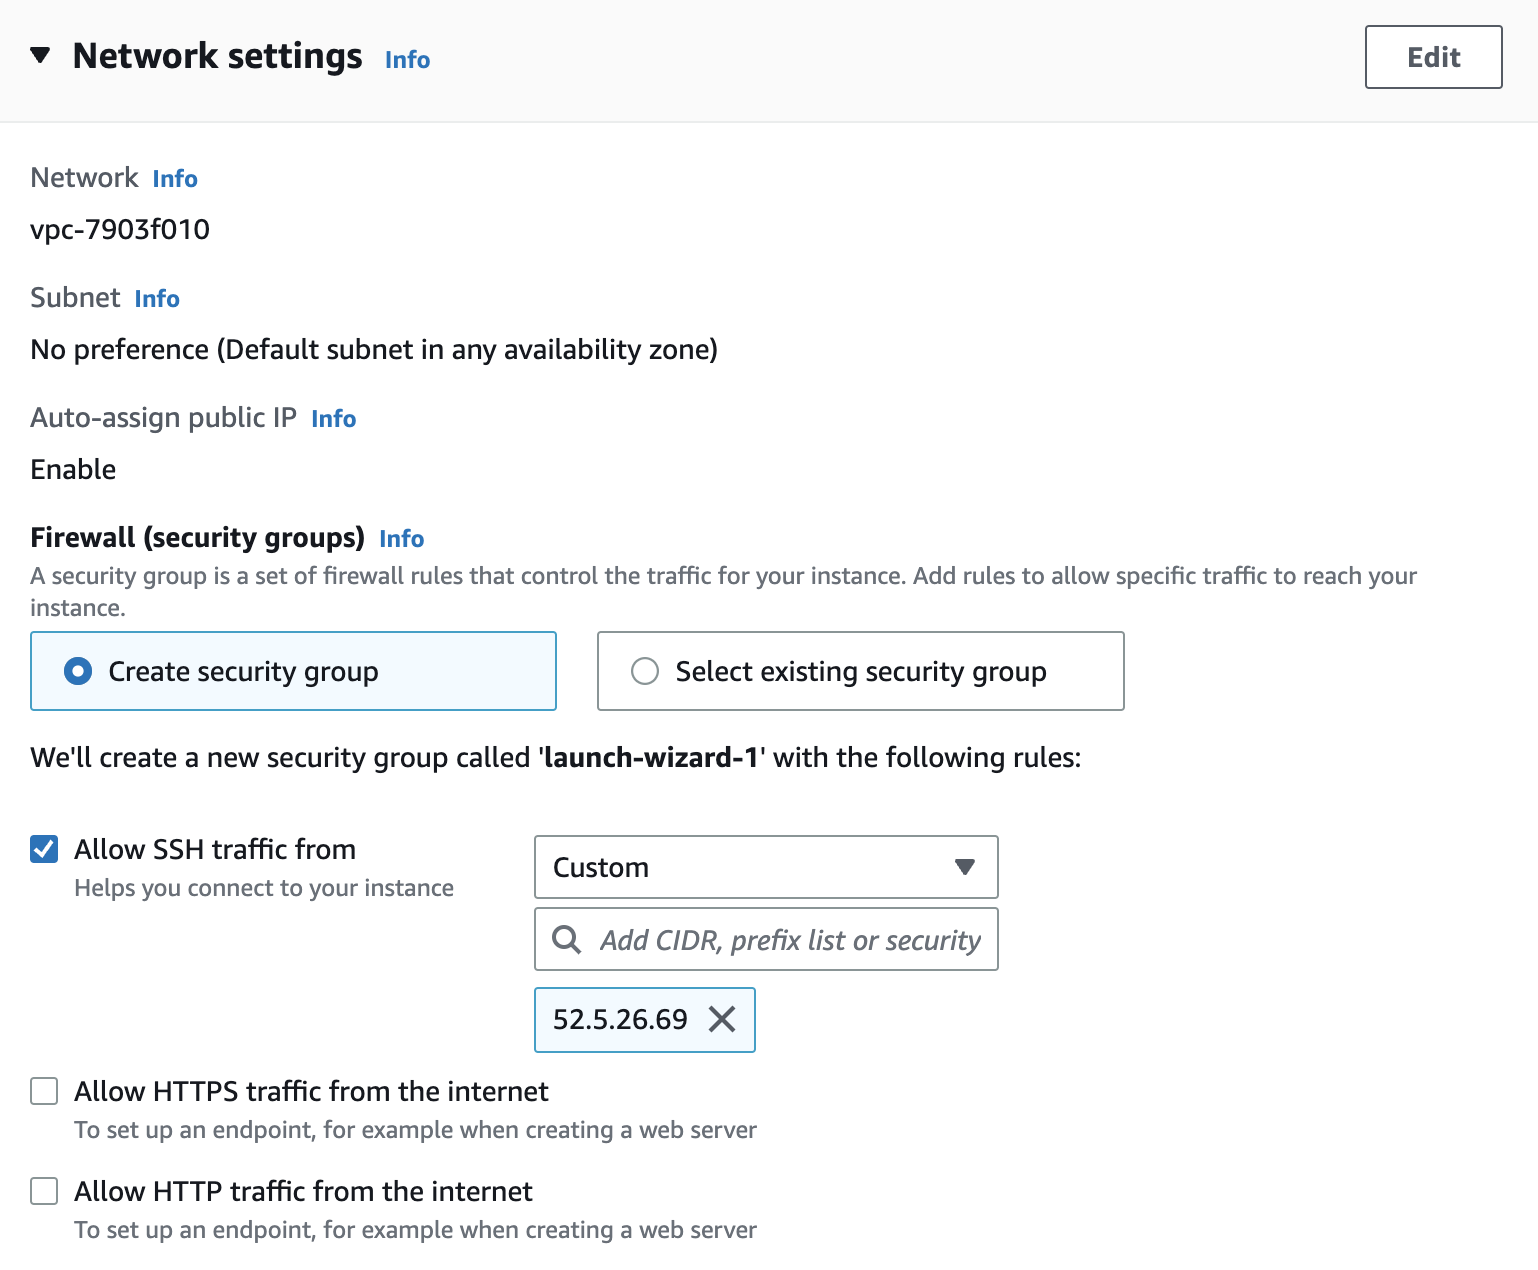
In the Network settings section, make sure that Allow SSH traffic is checked, and set the IP address to 52.5.26.69.
Click on Launch instance and wait for your instance to become available.
Connect your cluster to Humongous
At this point, we have everything we need to connect to Humongous. Let's go to the project creation page and click on Add new database.
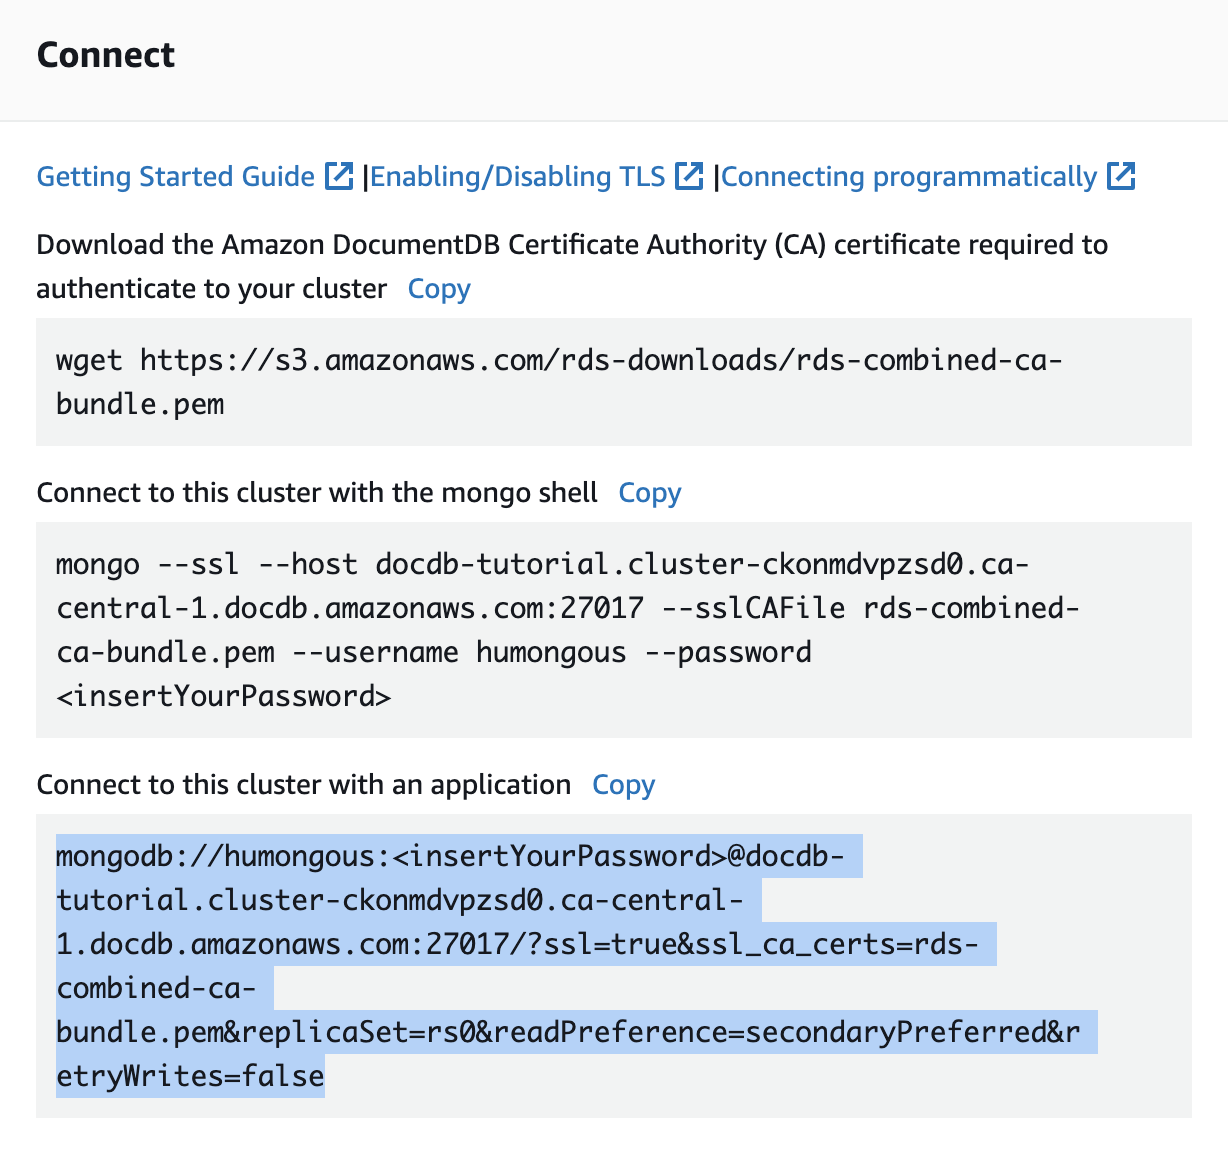
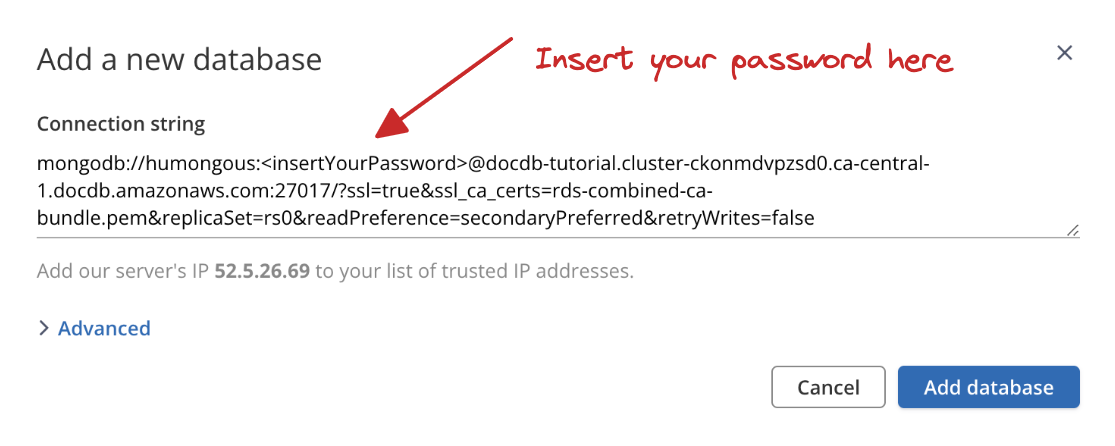
Copy your Connection string from your cluster's home page, and paste it inside the Connection string field in Humongous. Don't forget to replace <insertYourPassword> with your cluster's password.
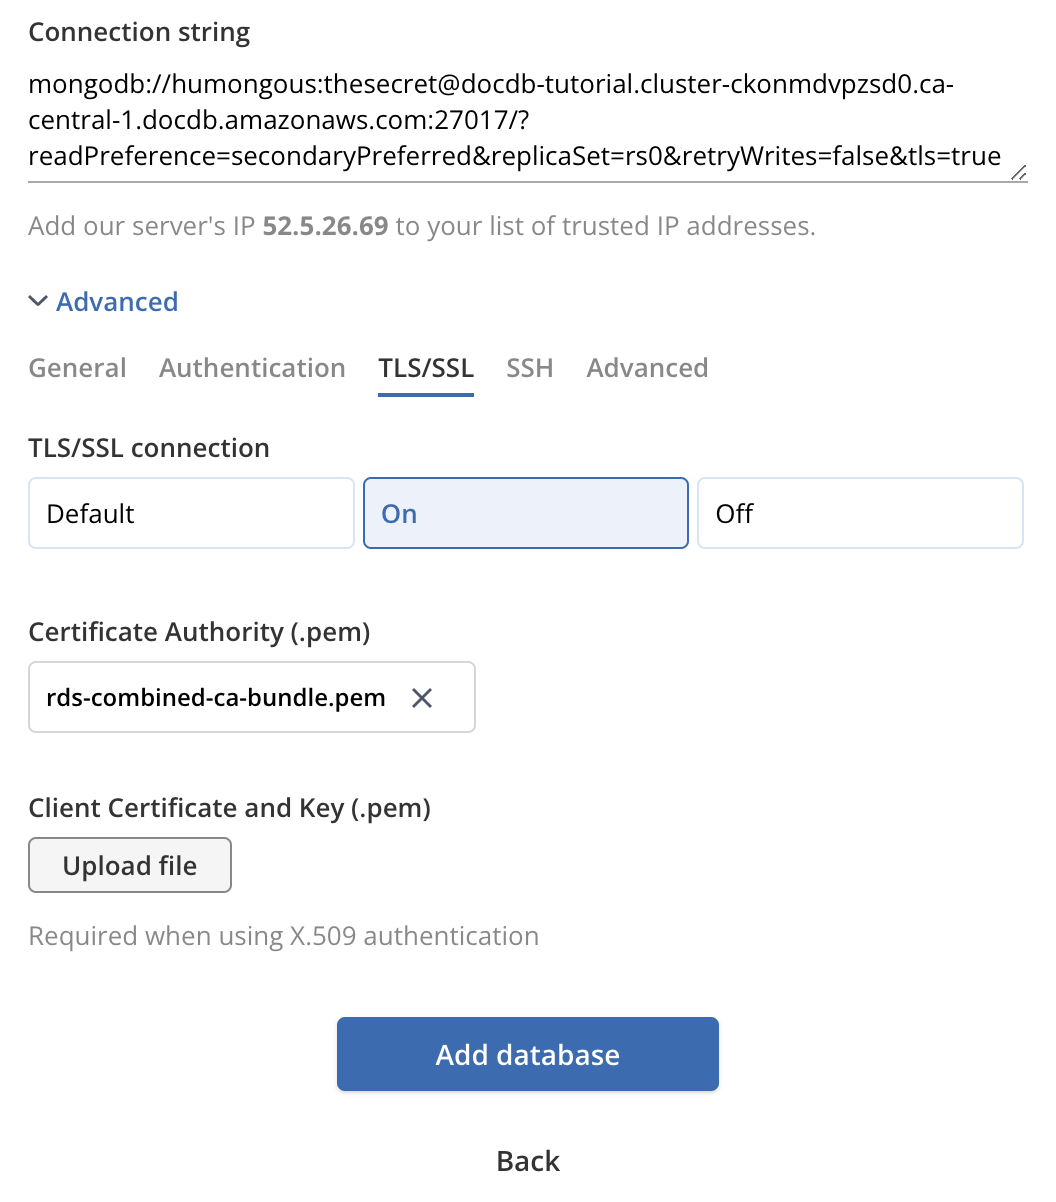
Next, click on Advanced and go to the TLS/SSL tab.
Download https://s3.amazonaws.com/rds-downloads/rds-combined-ca-bundle.pem and upload it to the Certificate Authority field on Humongous.
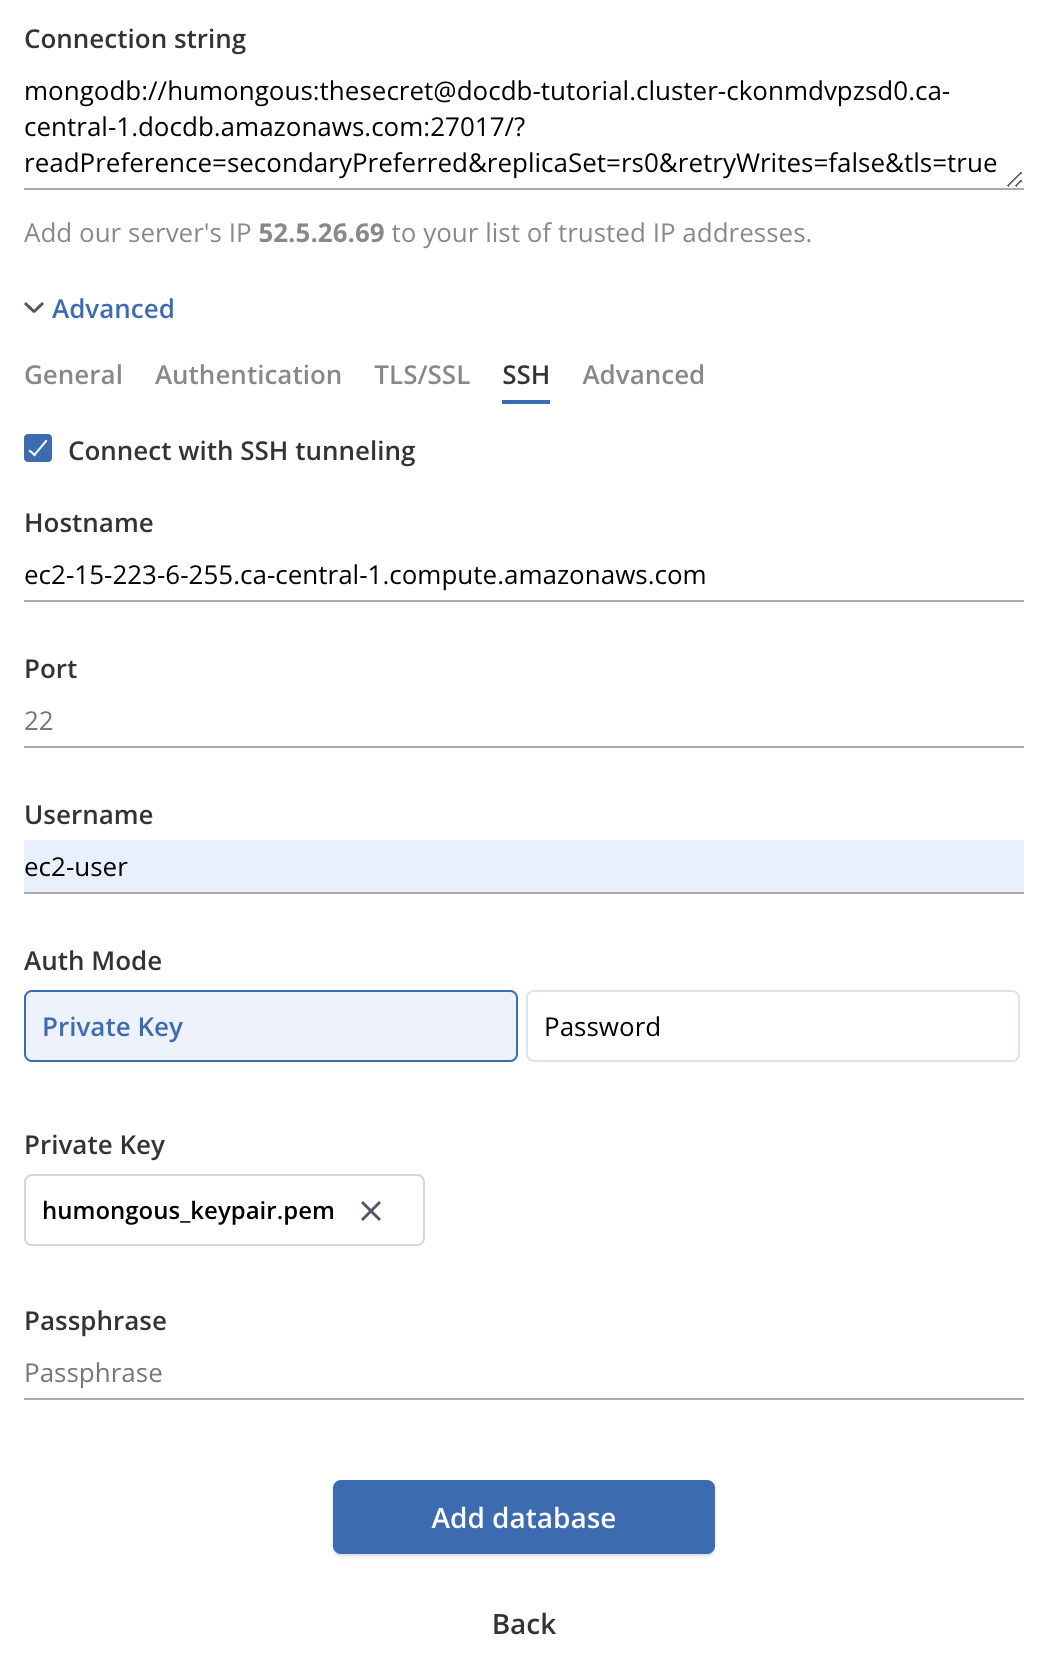
Finally, go to SSH tab and check Connect with SSH tunneling checkbox. Then, in the Hostname field, enter the public IP of the EC2 instance we created earlier, and enter ec2-user in the username field. Leave Auth Mode as Private Key and upload the Key pair we created earlier in the Private key field.
Click on Add database and that's it ✨!!